Changing An Oak Office Into a Blush Family Room - Installing Wallpaper Next!

Hello M’dears!!

I know that sometimes we need to see something to feel the inspiration for our own spaces. So here is a peek at a room in my home that has had many makeovers!! Perhaps one of them will inspire your space!

I know pictures do all the talking, so I won’t go into greeeaaaat detail. Also, I am at home with 3 children and its almost dinner time. So, if you have a question, leave it in the comments below!!

This room was green with a golf-themed border when we moved in.

oak trim

I painted the walls gray, moved my painting studio in and used the back wall as my wallpaper wall (wall where I test wallpaper ideas). Wasn’t it so cute!?!? The pattern shown on this wall is one I turned into a wallpaper. The two options are Studio Walls (small) and Studio Grande (large). They are fab!

copper corners art studio

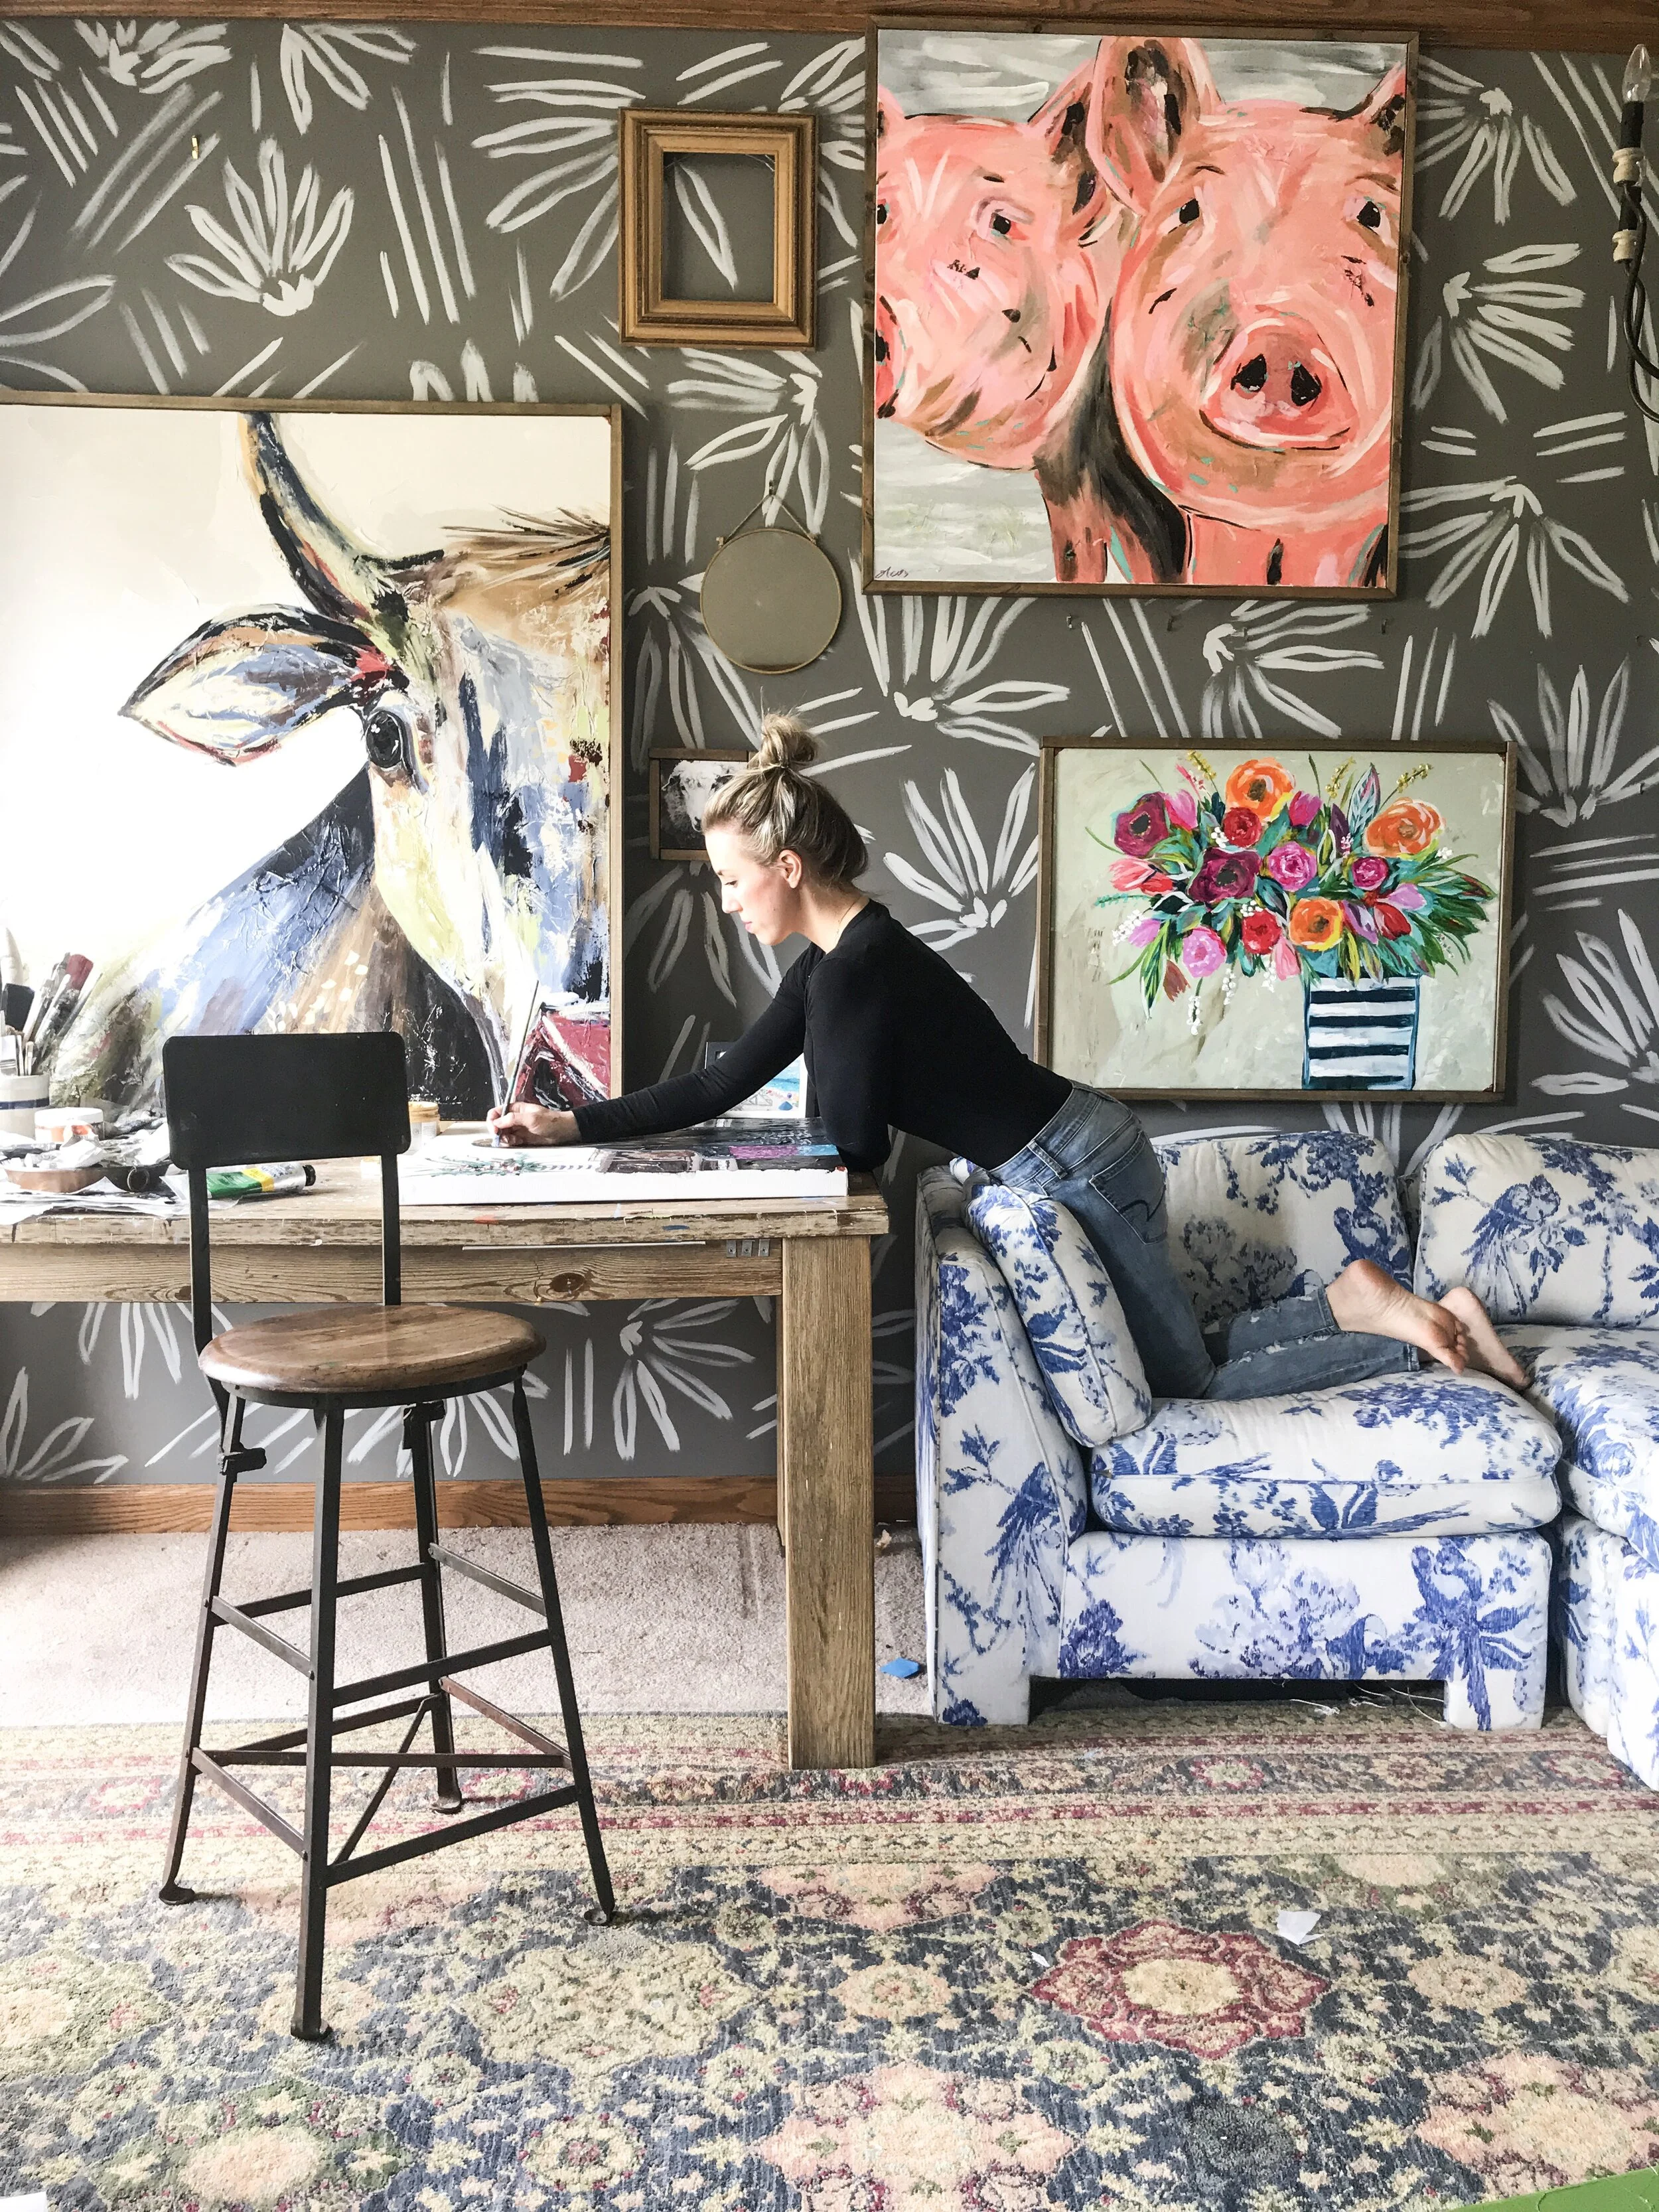
Fast forward 2 years and my art studio moved, once again, into the Copper Corners Art Gallery (you can visit us HERE!). After moving into the new gallery… this room was abandoned. Chernobyl-style. It looked like I left in a hurry and never came back. Paint stains on the floors, old paint brushes all over, random pieces of art hanging on the walls… and the worst part… it stayed like that for about a year. Ever heard the saying ‘The cobbler’s children have no shoes’? Yes, same here. I am so busy making sure that your spaces are stunning and beautiful, that mine sometimes get left behind. For a year. Ha!

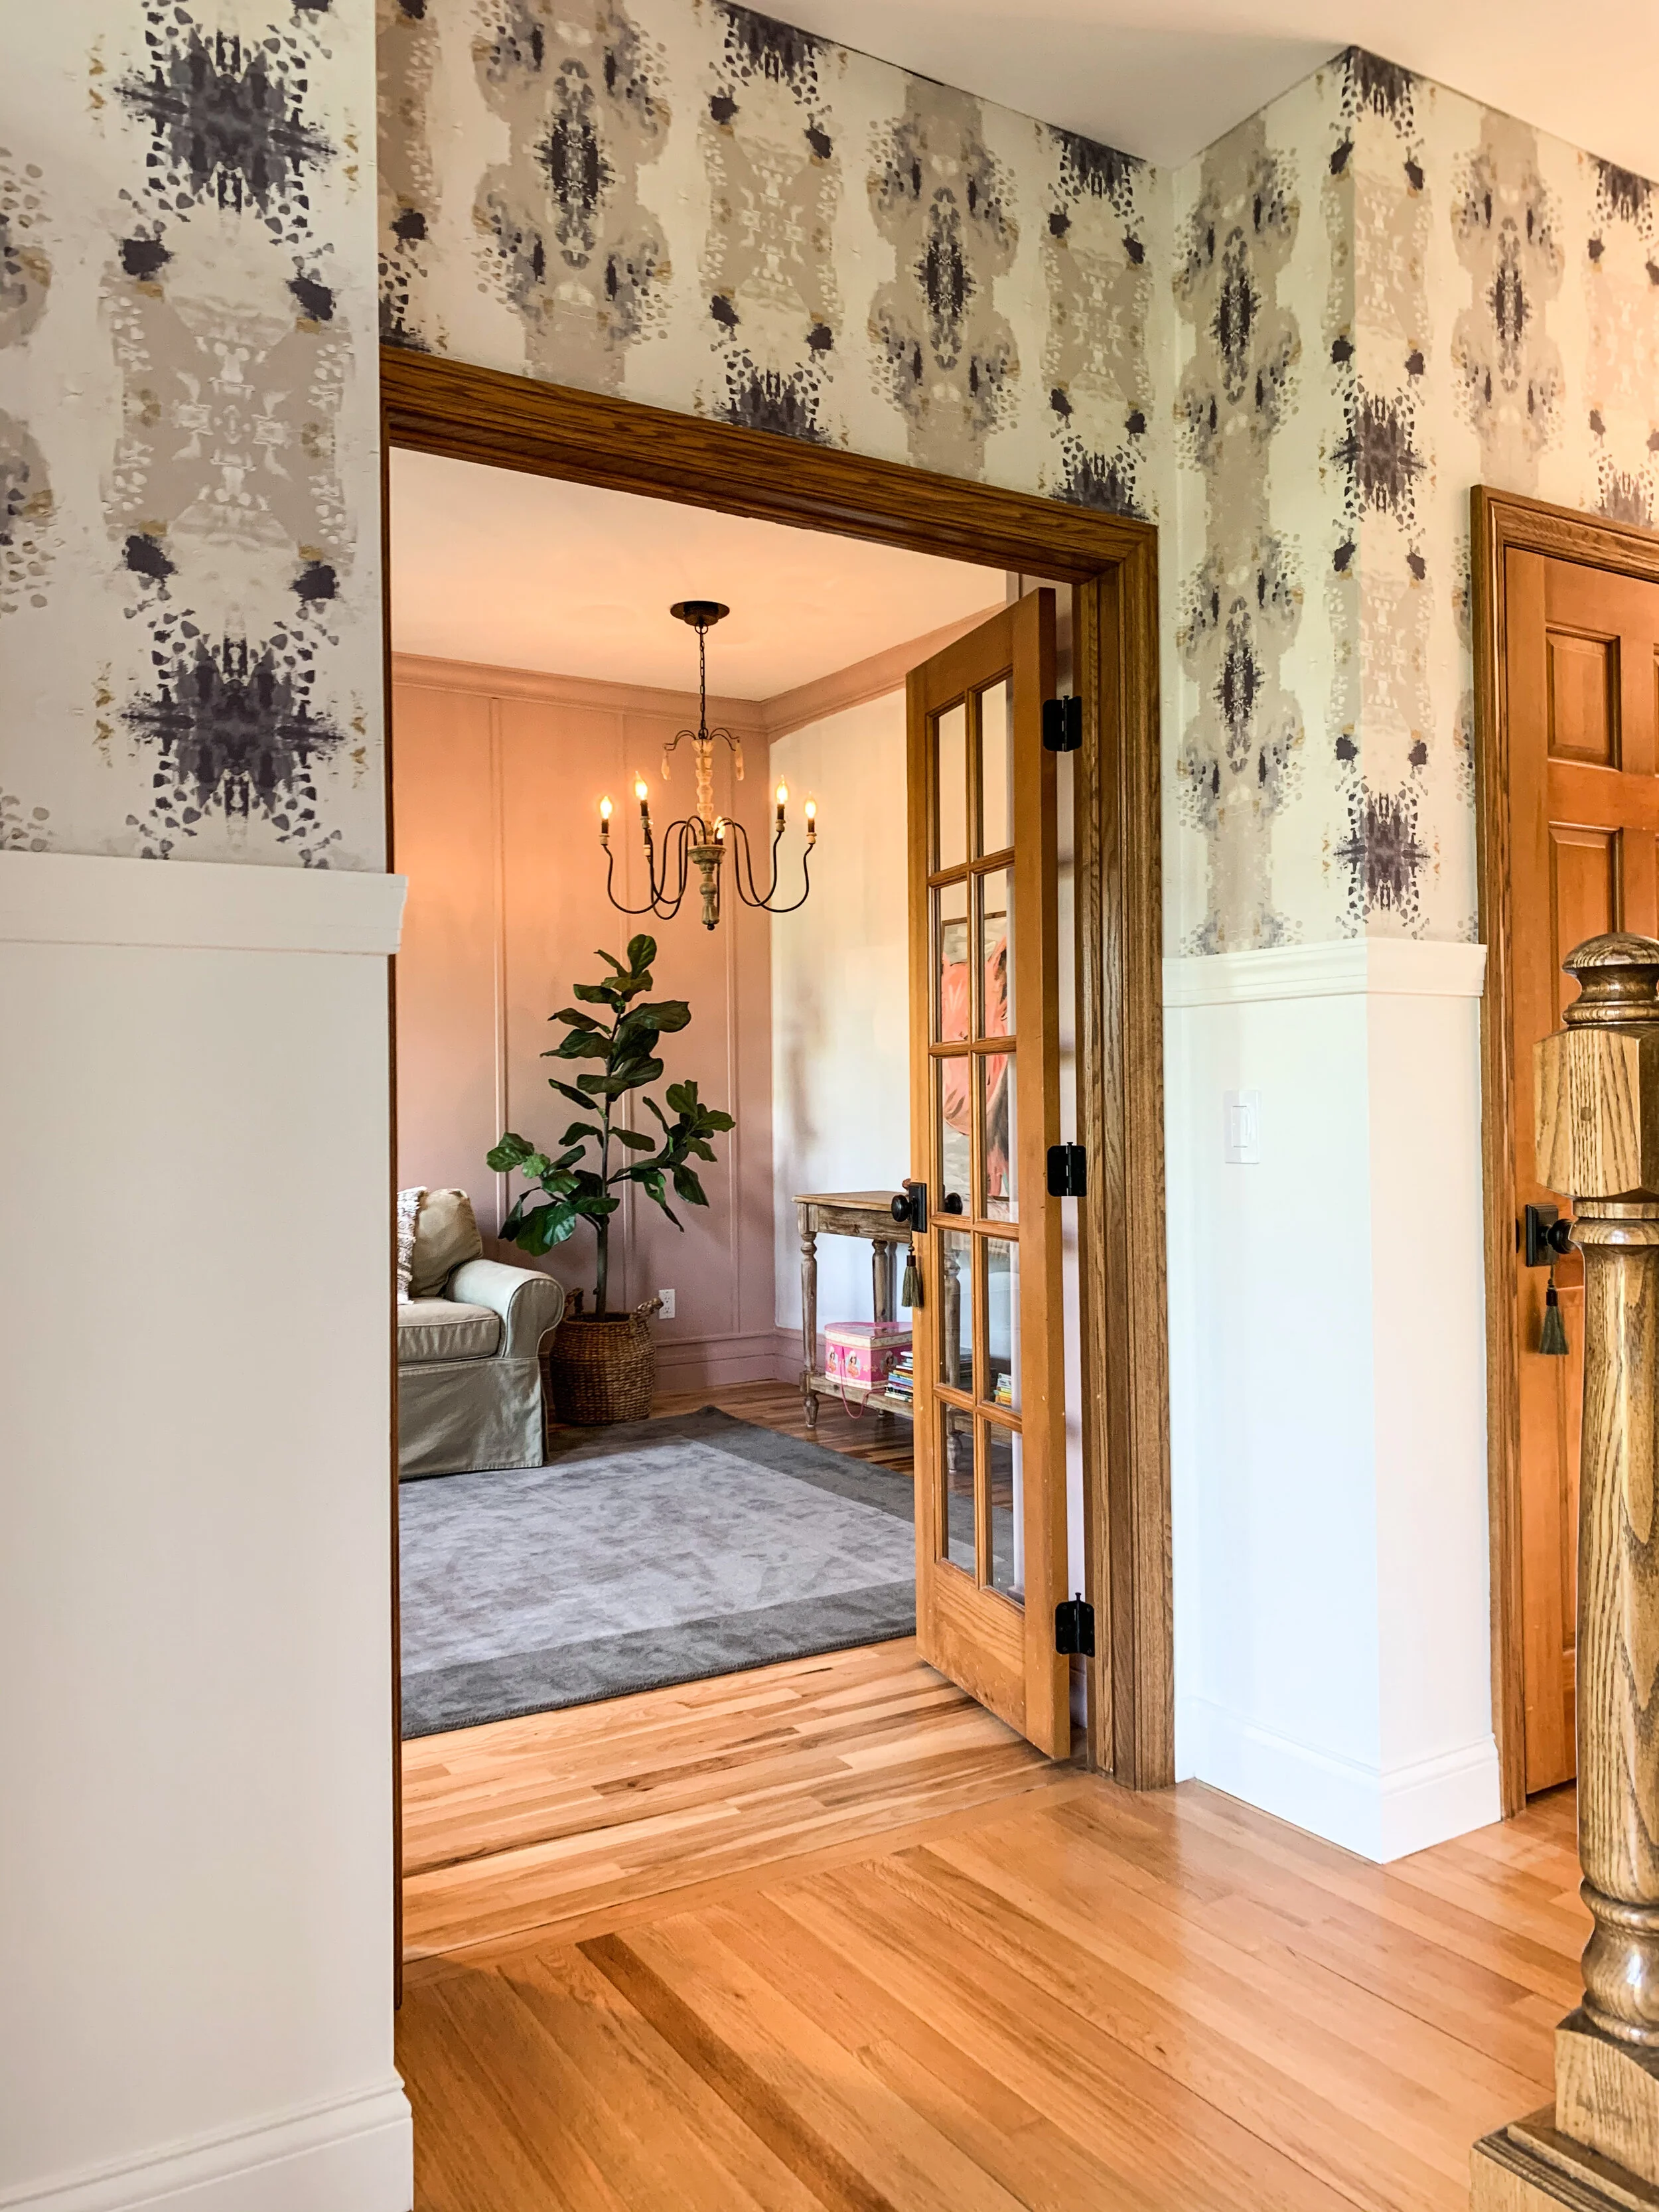
Here is a peek at what this room looked like for year. And this is right off of our foyer, guys! Which means that everyone who came over... saw my room of shame. I did manage to wallpaper the hallway though and it is STUNNING! It is the Slow Dance - Night wallpaper.

Chernobyl art studio

Chernobyl art studio

Since I was sick of living like a complete degenerate, the first thing we did was tear out the carpet and install hardwood floors. These floors are stunning in person and not nearly as expensive as I thought hardwoods would be! You can find what I used HERE. Since the stain was a tad different than our existing floors, we laid them horizontally (in a different direction).

installing hardwood floors

Once the floors were installed I started doing the really fun stuff. Nailing boards to the wall. Ok, not fun. But DEFINITELY worth it in the end!

Here is a lovely photo of me, from a fascinating angle (taken by my daughter). I bought a whole bunch of these thin strips of wood from Lowes. They are about an inch wide and 1/4 inch thick, I spaced them 1.5 feet apart. Always have a level to make sure you are nailing them straight.

The strips only came in 8ft lengths and I have 9 ft ceilings. So, if you look at the bottom of the photo you will see a horizontal strip of wood, a few inches above the floor trim. I did this so that the 8ft lengths would work. Also, it beefs up the floor trim making it look better and giving the trim a richer feel..

building wainscoting

Next up, testing paint. When painting more than one wall pinkl, my rule of thumb is to go a few shades more muted than you originally wanted. Once pink is on all 4 walls, it bounces off of each other, reflecting and making the room even more pink than you imagined. Tone it down.

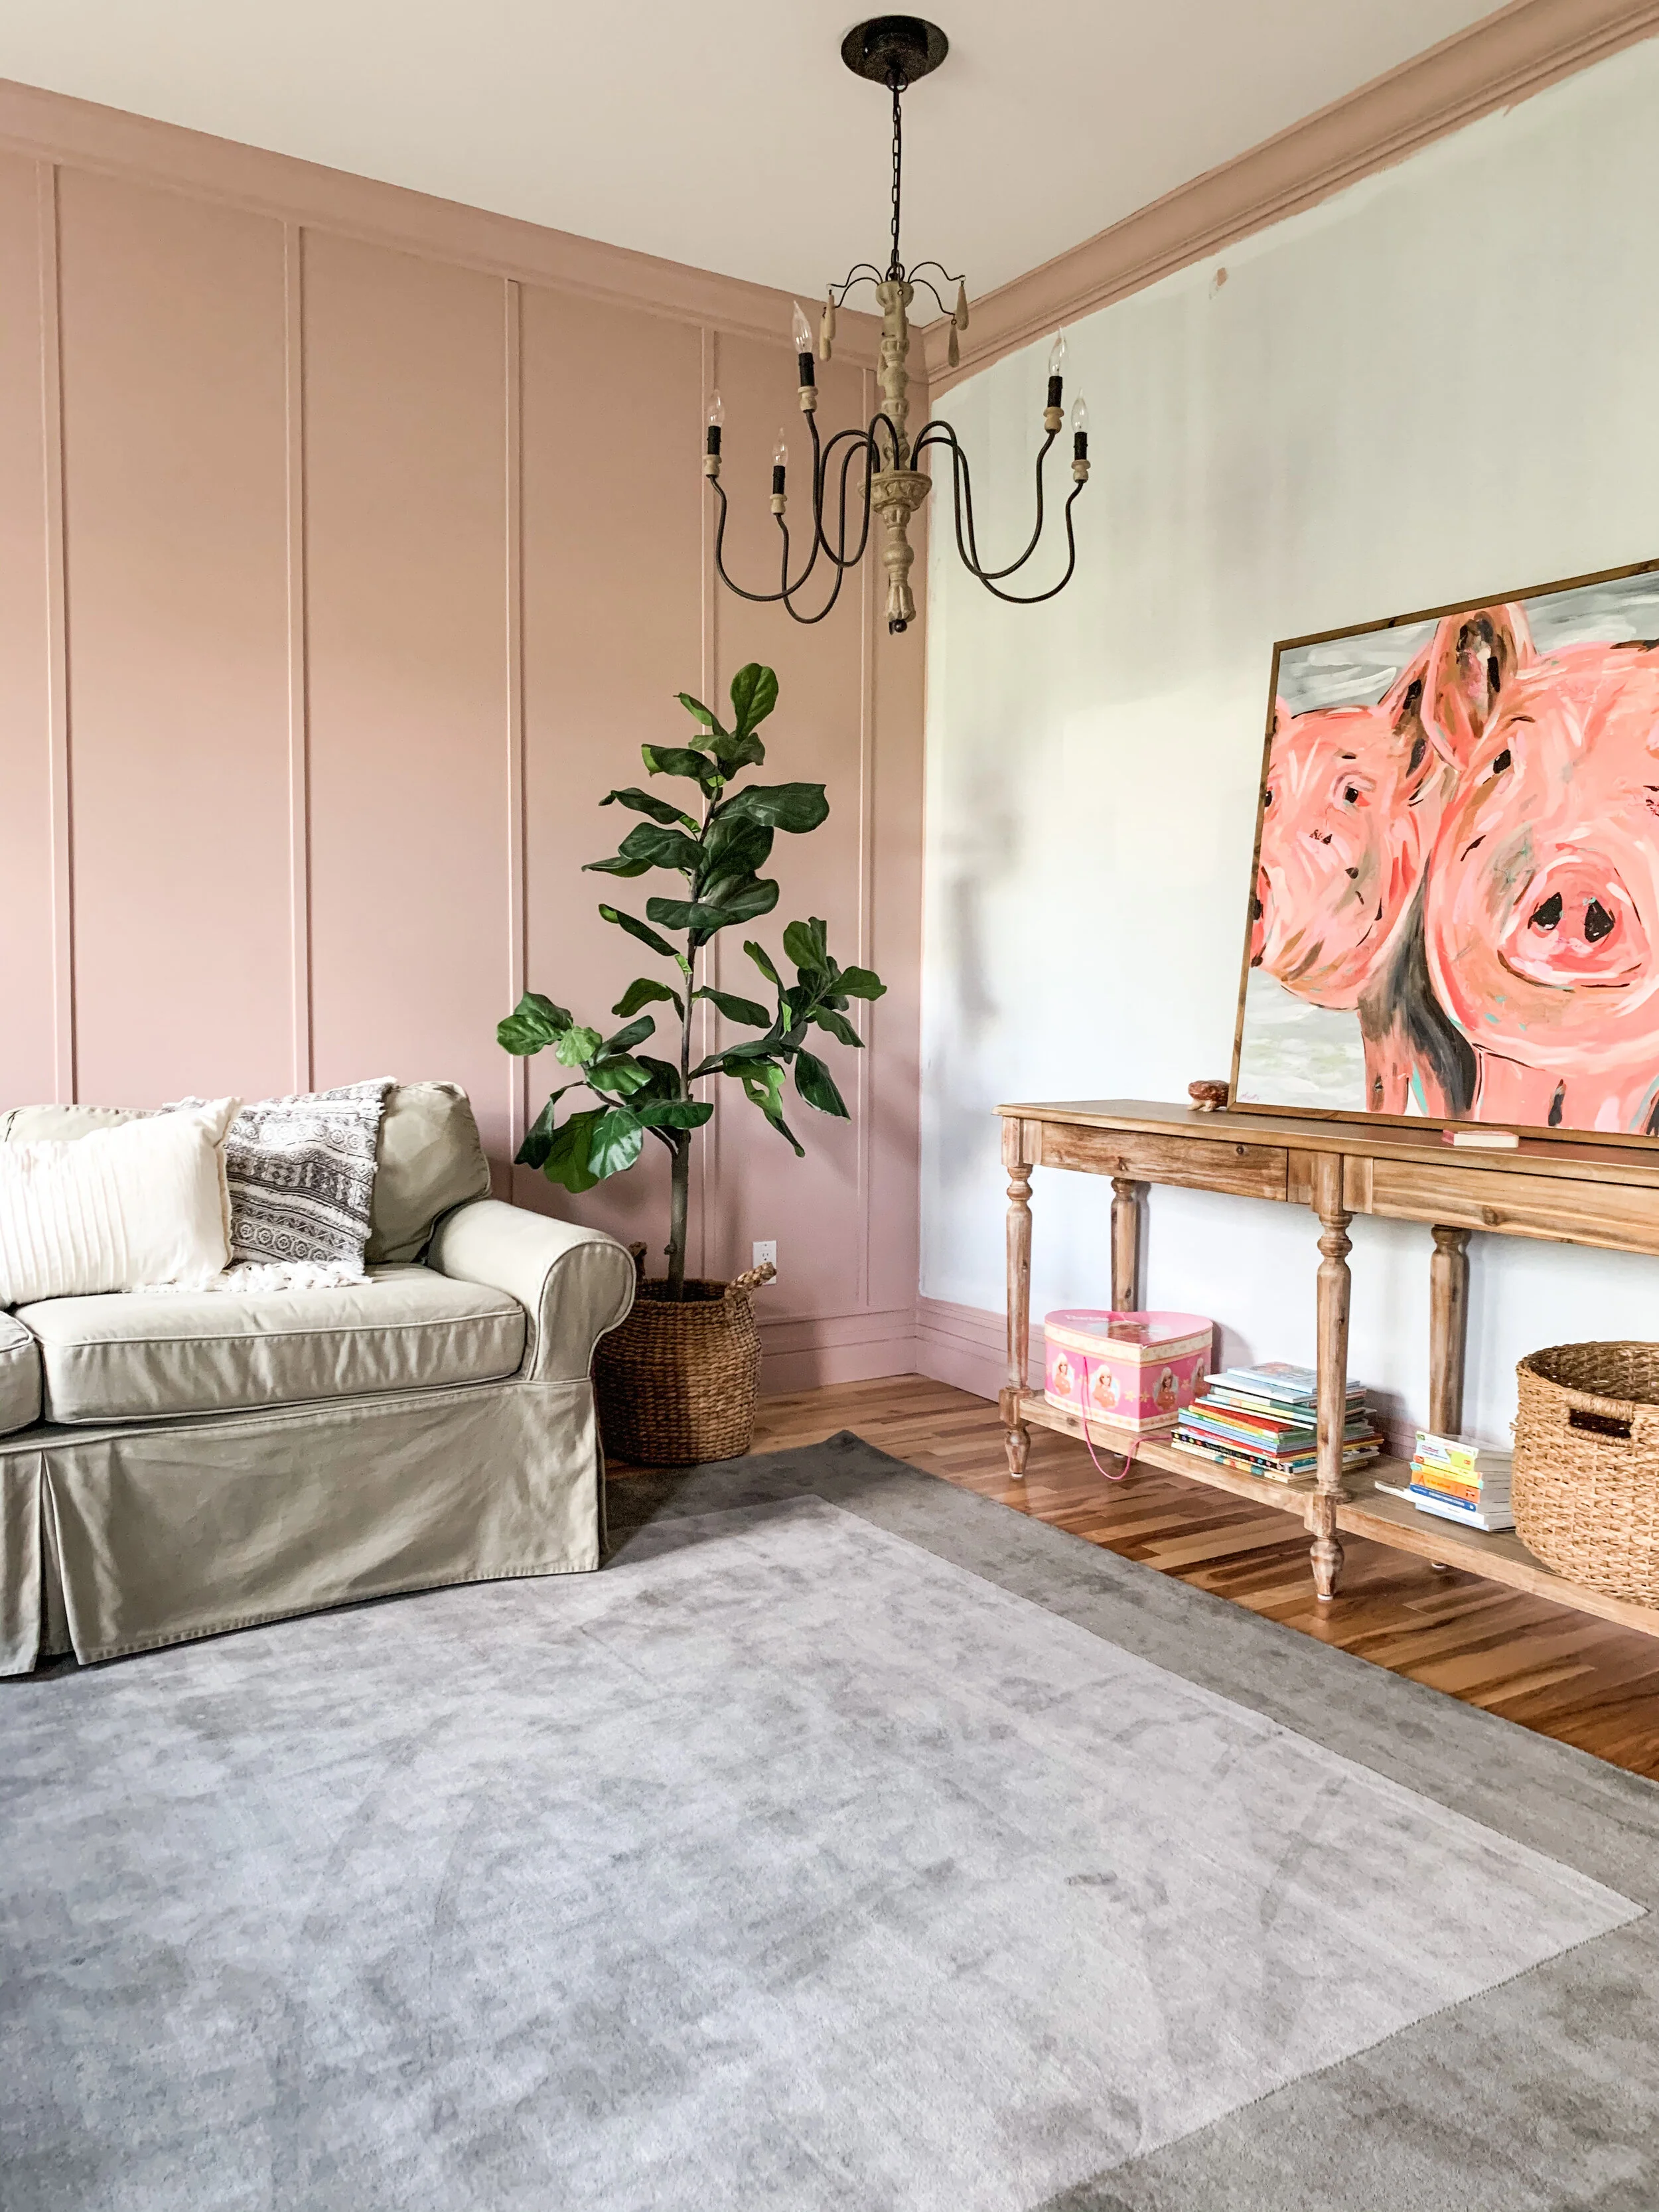
I bought a few samples, tested them on all walls and decided that LoveBug by Valspar was the winner!

I also bought THIS RUG which I love, but decided that it would do much better in our upcoming Margarita/coffee/reading/adult room, because Barbie shoes and legos disappeared into the rug within the first hour that is was out. More on that upcoming room soon!!!!!

the perfect blush paint

Lovebug Valspar will be on three walls. The fourth wall will be the tv wall, which will have the wallpaper CHEERIO BLUSH behind it. I am giddy with excitement to get to that part!!!!!!!!!!!!!!!!!

love bug by valspar

Once the first coat of paint was on the wall, I COULD NOT CONTROL MYSELF OR WAIT ANY LONGER. I immediately unrolled THIS RUG, put THIS TABLE together and pulled out some of my FAVORITE ARTWORK. The kids couldn’t wait either. They moved their dinosaur collection in ;).

love bug by valspar

Once the paint was actually finished, we moved everything in! The WALLPAPER still needs to be in installed, so that will be coming up soon in another blog post :). But, boy oh boy, I freaking love it!!! Today the kids told me that it is their favorite room in the house! Even my son, who was skeptical about the blush, says he loves it :).

I really wanted to have a sleek look that would showcase the CHEERIO WALLPAPER, so I painted the crown moulding as well as the floor trim the same Lovebug color as the walls.

Ok, I know you want to know ALL THE THINGS, so here are a few inks for the CHANDELIER , PIG ARTWORK, RUG, SOFA, FIG TREE and the CONSOLE TABLE..

lovebug paint by valspar

And just because it is SO MUCH FUN to see before and afters…. here is one for you!

oak trim
cool wallpaper

Next up will be installing the Cheerio wallpaper and then we will move on to the Margarita room!!!! Cheers to that!!!!!

Xo

M-C

P.S. UPDATE: Click HERE to see the wallpaper installed :).

BLUSH FAMILY ROOM.jpg

We All Need A Fabulous Margarita or Mocktail Recipe - Easy!

Hello M’dears,

I have a gift for you today. A gift you will use time and time again. A gift that you can give to your children, grand children and great grand children. A gift that will instantly turn you into the favorite family member, friend, neighbor and so on.

My Margarita recipe.

Yes, I am giving it to you because I love you. All I ask in return is that you furnish your entire home with Copper Corners artwork and wallpaper. No biggie.

I also included my Margarita Mocktail recipe because sometimes we have babies and pounding tequila is frowned upon during those sweet 9 months. Also, if you fly off the hinges when you drink booze, stick to this mocktail!! You know who you are ;).

Screen Shot 2020-07-10 at 12.29.10 PM.png

As you all know, the Copper Corners COPPER collection makes everything taste better, so use that to make your drinks! If you did not get a chance to snag this collection while it was available…. well… I just don’t know what to say.

Ok, here we go!! This recipe makes a drink and a half. Double it for 2 people.

Copper Corners MARGARITA RECIPE:

1 shot of fresh lime juice

1 shot of Tequila

1 shot of simple syrup (boil 1 cup water + 1 cup sugar for 1 minute. Let cool)

Get out your fabulous copper cocktail shaker and fill it half way with ice. Add all ingredients. Shake. Pour into your fabulous copper cups. Slice a lime wedge and add it to the rim to be extra fancy. The drink tastes even better when you feel fancy.

Not to complicate things…but Jordan (my husband) is on a KETO diet. So, if you prefer a KETO MARGARITA recipe, just switch out the simple syrup for Lacroix Key Lime sparkling water. Voilà.

Copper Corners MARGARITA MOCKTAIL RECIPE:

1 shot fresh orange juice

1 shot fresh lime juice

1 shot simple syrup

1 splash of sparkling water (flavored if you prefer)

Get out your fabulous copper cocktail shaker and fill it half way with ice. Add all ingredients. Shake. Pour into your fabulous copper cups. Slice a lime wedge and add it to the rim to be extra fancy. The drink tastes even better when you feel fancy.

And there you have it folks. Lives have officially been changed today.

ENJOY!!!!!!!!!!

Screen Shot 2020-07-10 at 12.18.30 PM.png

Screen Shot 2020-07-10 at 12.24.51 PM.png

Creating a Coffee + Reading Room

We moved my painting studio out of our home and to the Copper Corners Gallery just over a year ago.

It took a quarantine to finally get me inspired to re-do this old room. Jordan and I decided that we are going to turn it into a Coffee + Reading room. That sound so luxurious, doesn’t it?! Our entire house is dedicated to our 3 children, so this is going to be a space dedicated to adults!! At night, it will switch to the Cocktail + Conversation + Reading room ;)

So here is my plan: A small cozy space, fabulous wallpaper, great rug and 4 comfy chairs set around a circular ottoman. Can you picture it??

I put together a few options that I love and we are letting YOU decide on the final choices. Its all very exciting!

HERE is the chair that I chose. I love it because it has a classic, yet cozy, vibe and YOU get to choose from so many great fabrics. It also has a wider and deeper seat than most of the other chairs, making it great for bigger guys :).

Take a peek at each photo and imagine yourself sitting in this room enjoying a margarita with me, Which room do you want to be in?! Leave your choice in the comments below. Can’t wait to see which one you love!!

P.s. I linked the chair, wallpapers and rugs in case you are feeling inspired to create a fabulous space as well ;).

Option A:

WallpaperRug (use the code CC55 right now for 55% off!!)Chair

Wallpaper

Rug (use the code CC55 right now for 55% off!!)

Chair

Option B:

WallpaperRug (use the code CC55 right now for 55% off!!)Chair

Wallpaper

Rug (use the code CC55 right now for 55% off!!)

Chair

Option C

WallpaperRug (use the code CC55 right now for 55% off!!)Chair

Wallpaper

Rug (use the code CC55 right now for 55% off!!)

Chair

Option D

WallpaperRug (use the code CC55 right now for 55% off!!)Chair

Wallpaper

Rug (use the code CC55 right now for 55% off!!)

Chair

Option E

WallpaperRug (use the code CC55 right now for 55% off!!)Chair

Wallpaper

Rug (use the code CC55 right now for 55% off!!)

Chair

Option F

WallpaperRug (use the code CC55 right now for 55% off!!)Chair

Wallpaper

Rug (use the code CC55 right now for 55% off!!)

Chair

Option G

WallpaperRug (use the code CC55 right now for 55% off!!)Chair

Wallpaper

Rug (use the code CC55 right now for 55% off!!)

Chair

Option H

WallpaperRug (use the code CC55 right now for 55% off!!)Chair

Wallpaper

Rug (use the code CC55 right now for 55% off!!)

Chair

Write your favorite option in the comments below! :)

XO

Mary-Catheryn