

Here is a photo I snapped of the ‘formal living room’ the first time we walked through this house. It was just. a regular ol 90’s formal living room. Nothing special.
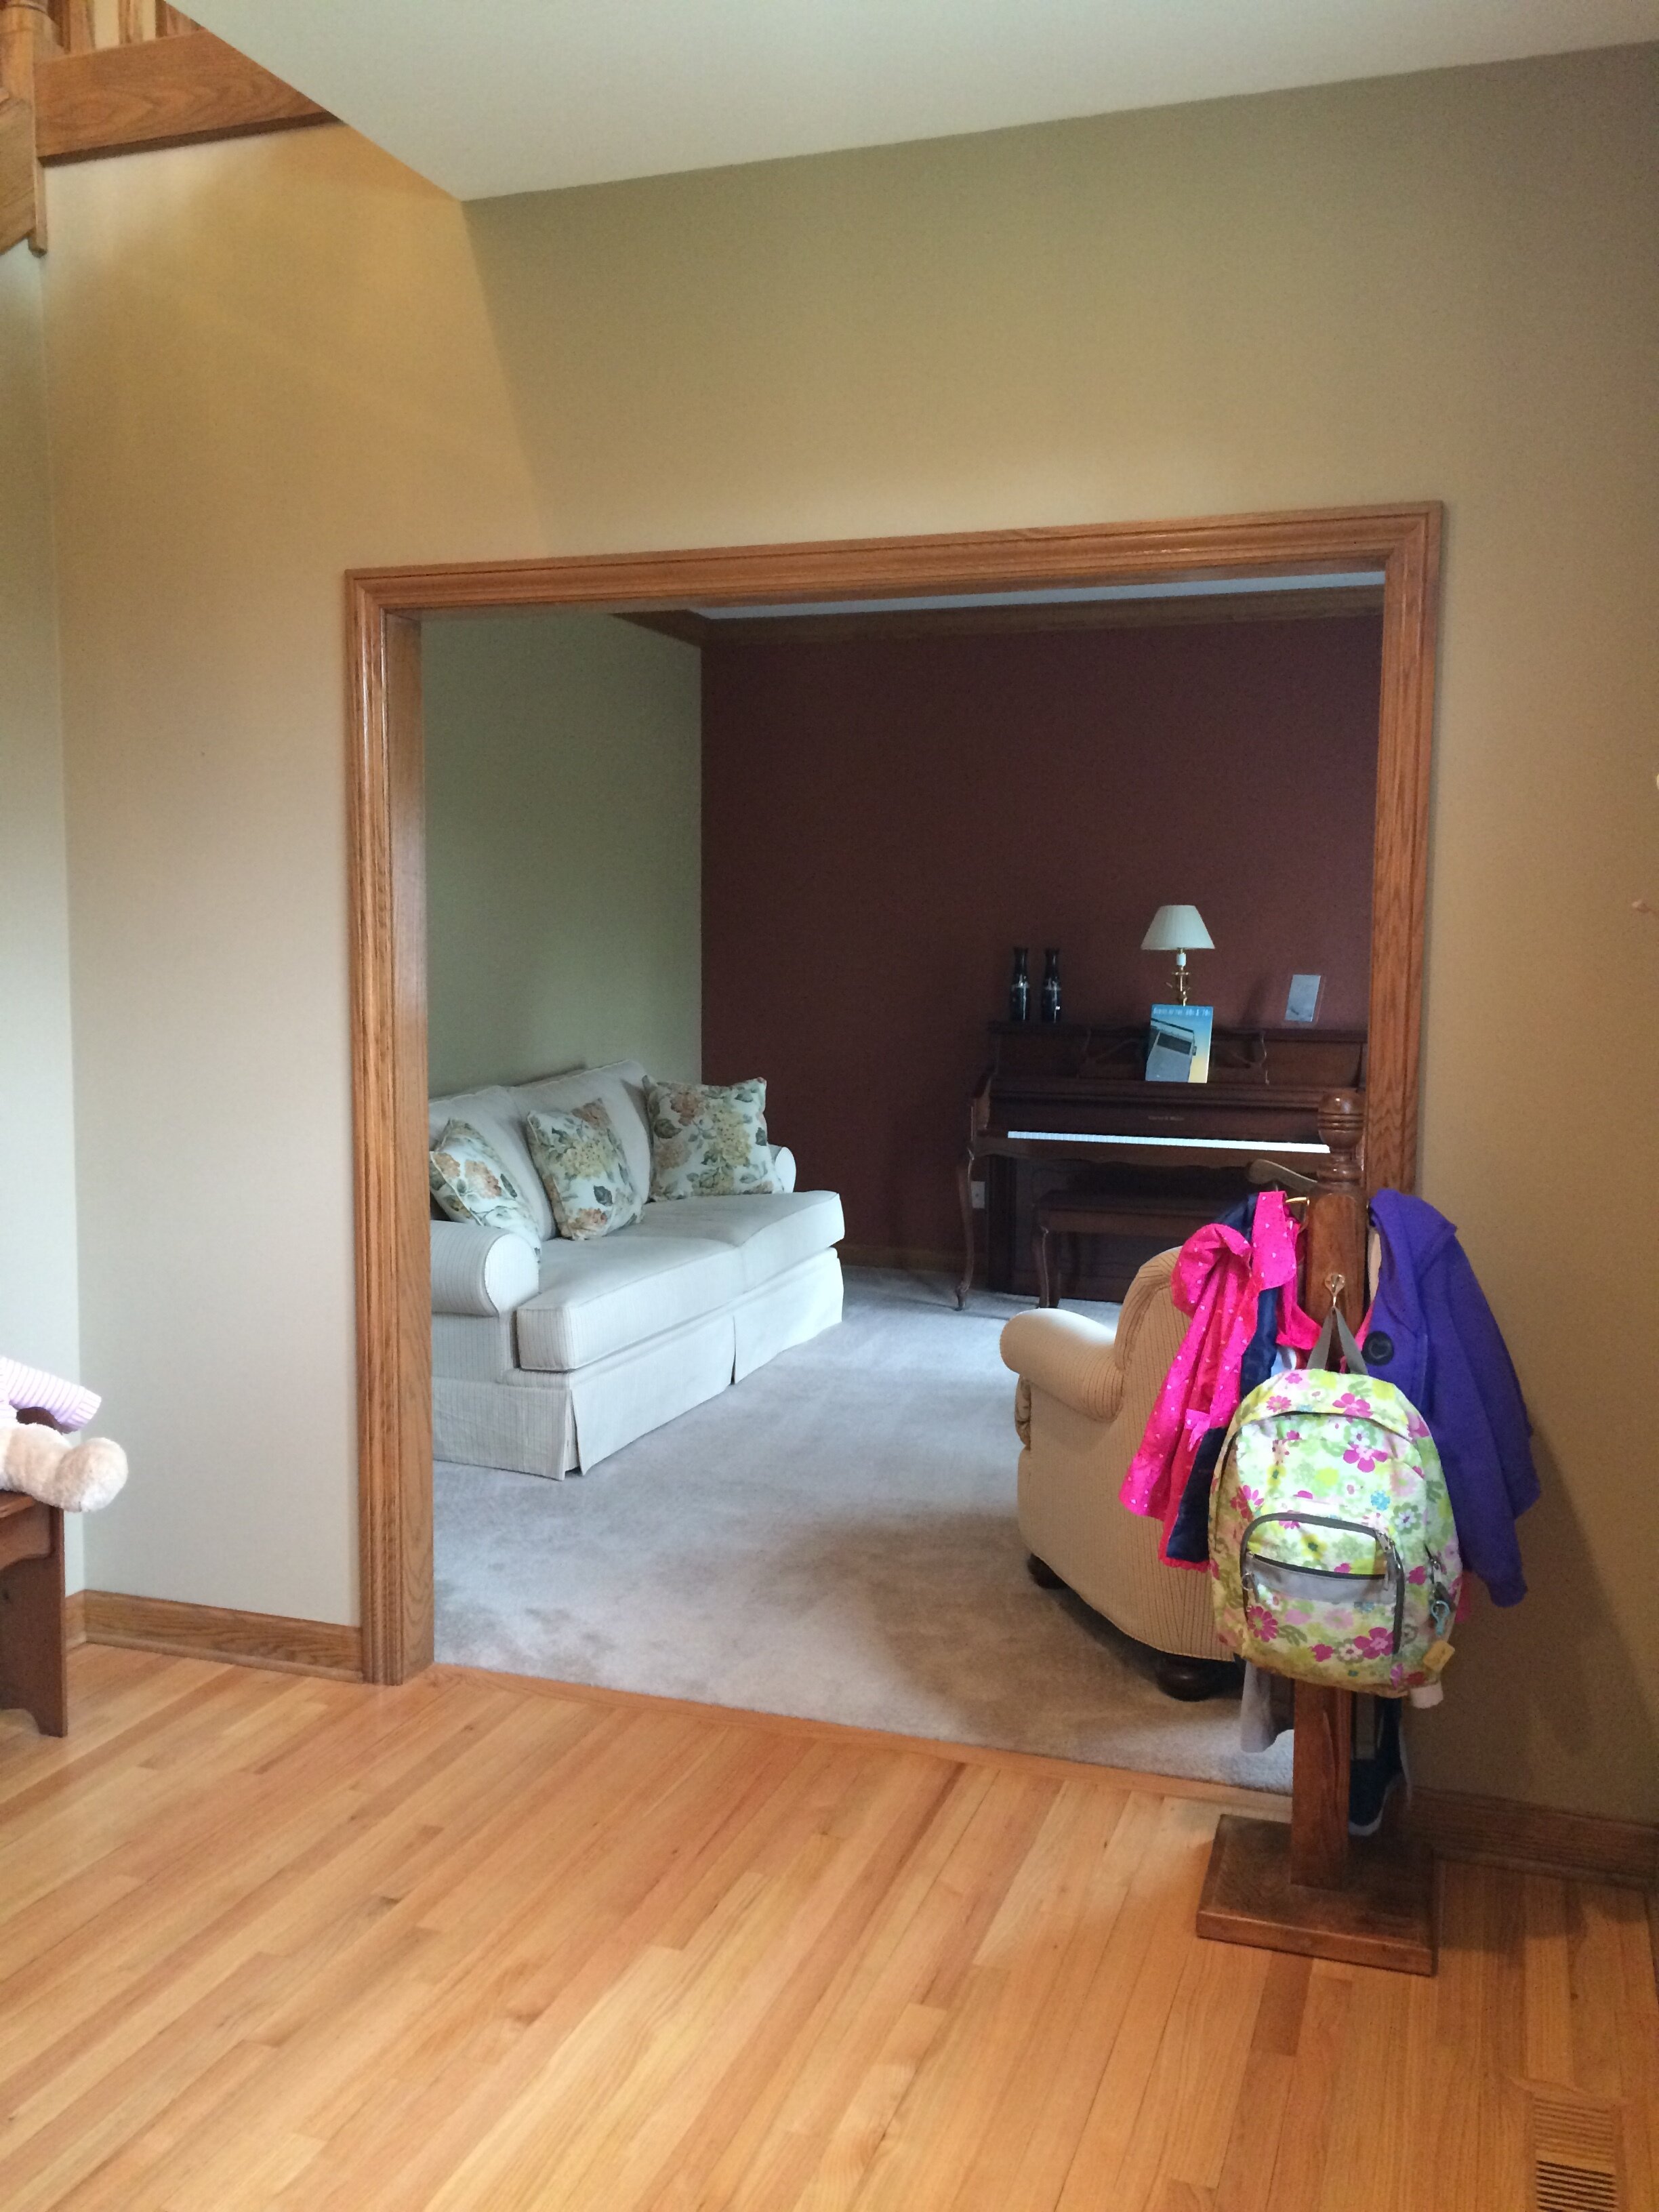
We moved in and that formal living room instantly became a play-room for our 3 children.
If you know anything about play-rooms… you know they are usually a mess.
To top it off, this room is one of the first things you see when you walk in the front door of our home. When anyone came over, it screamed “Welcome to our home, the DISASTER zone”. Good times😂.
I was dreaming of all of the things I would do with that space the minute my children weren’t into toys anymore. And guys, that moment came last year! Our youngest is almost 6 and she is no longer into toys, but rather into hair and makeup. So we finally cleaned out that playroom and I started making it FAB.
One of the very first things that I did (while it was still a play-room) was switch out the moulding around the doorway. This made the biggest difference EVER. See for yourself!!

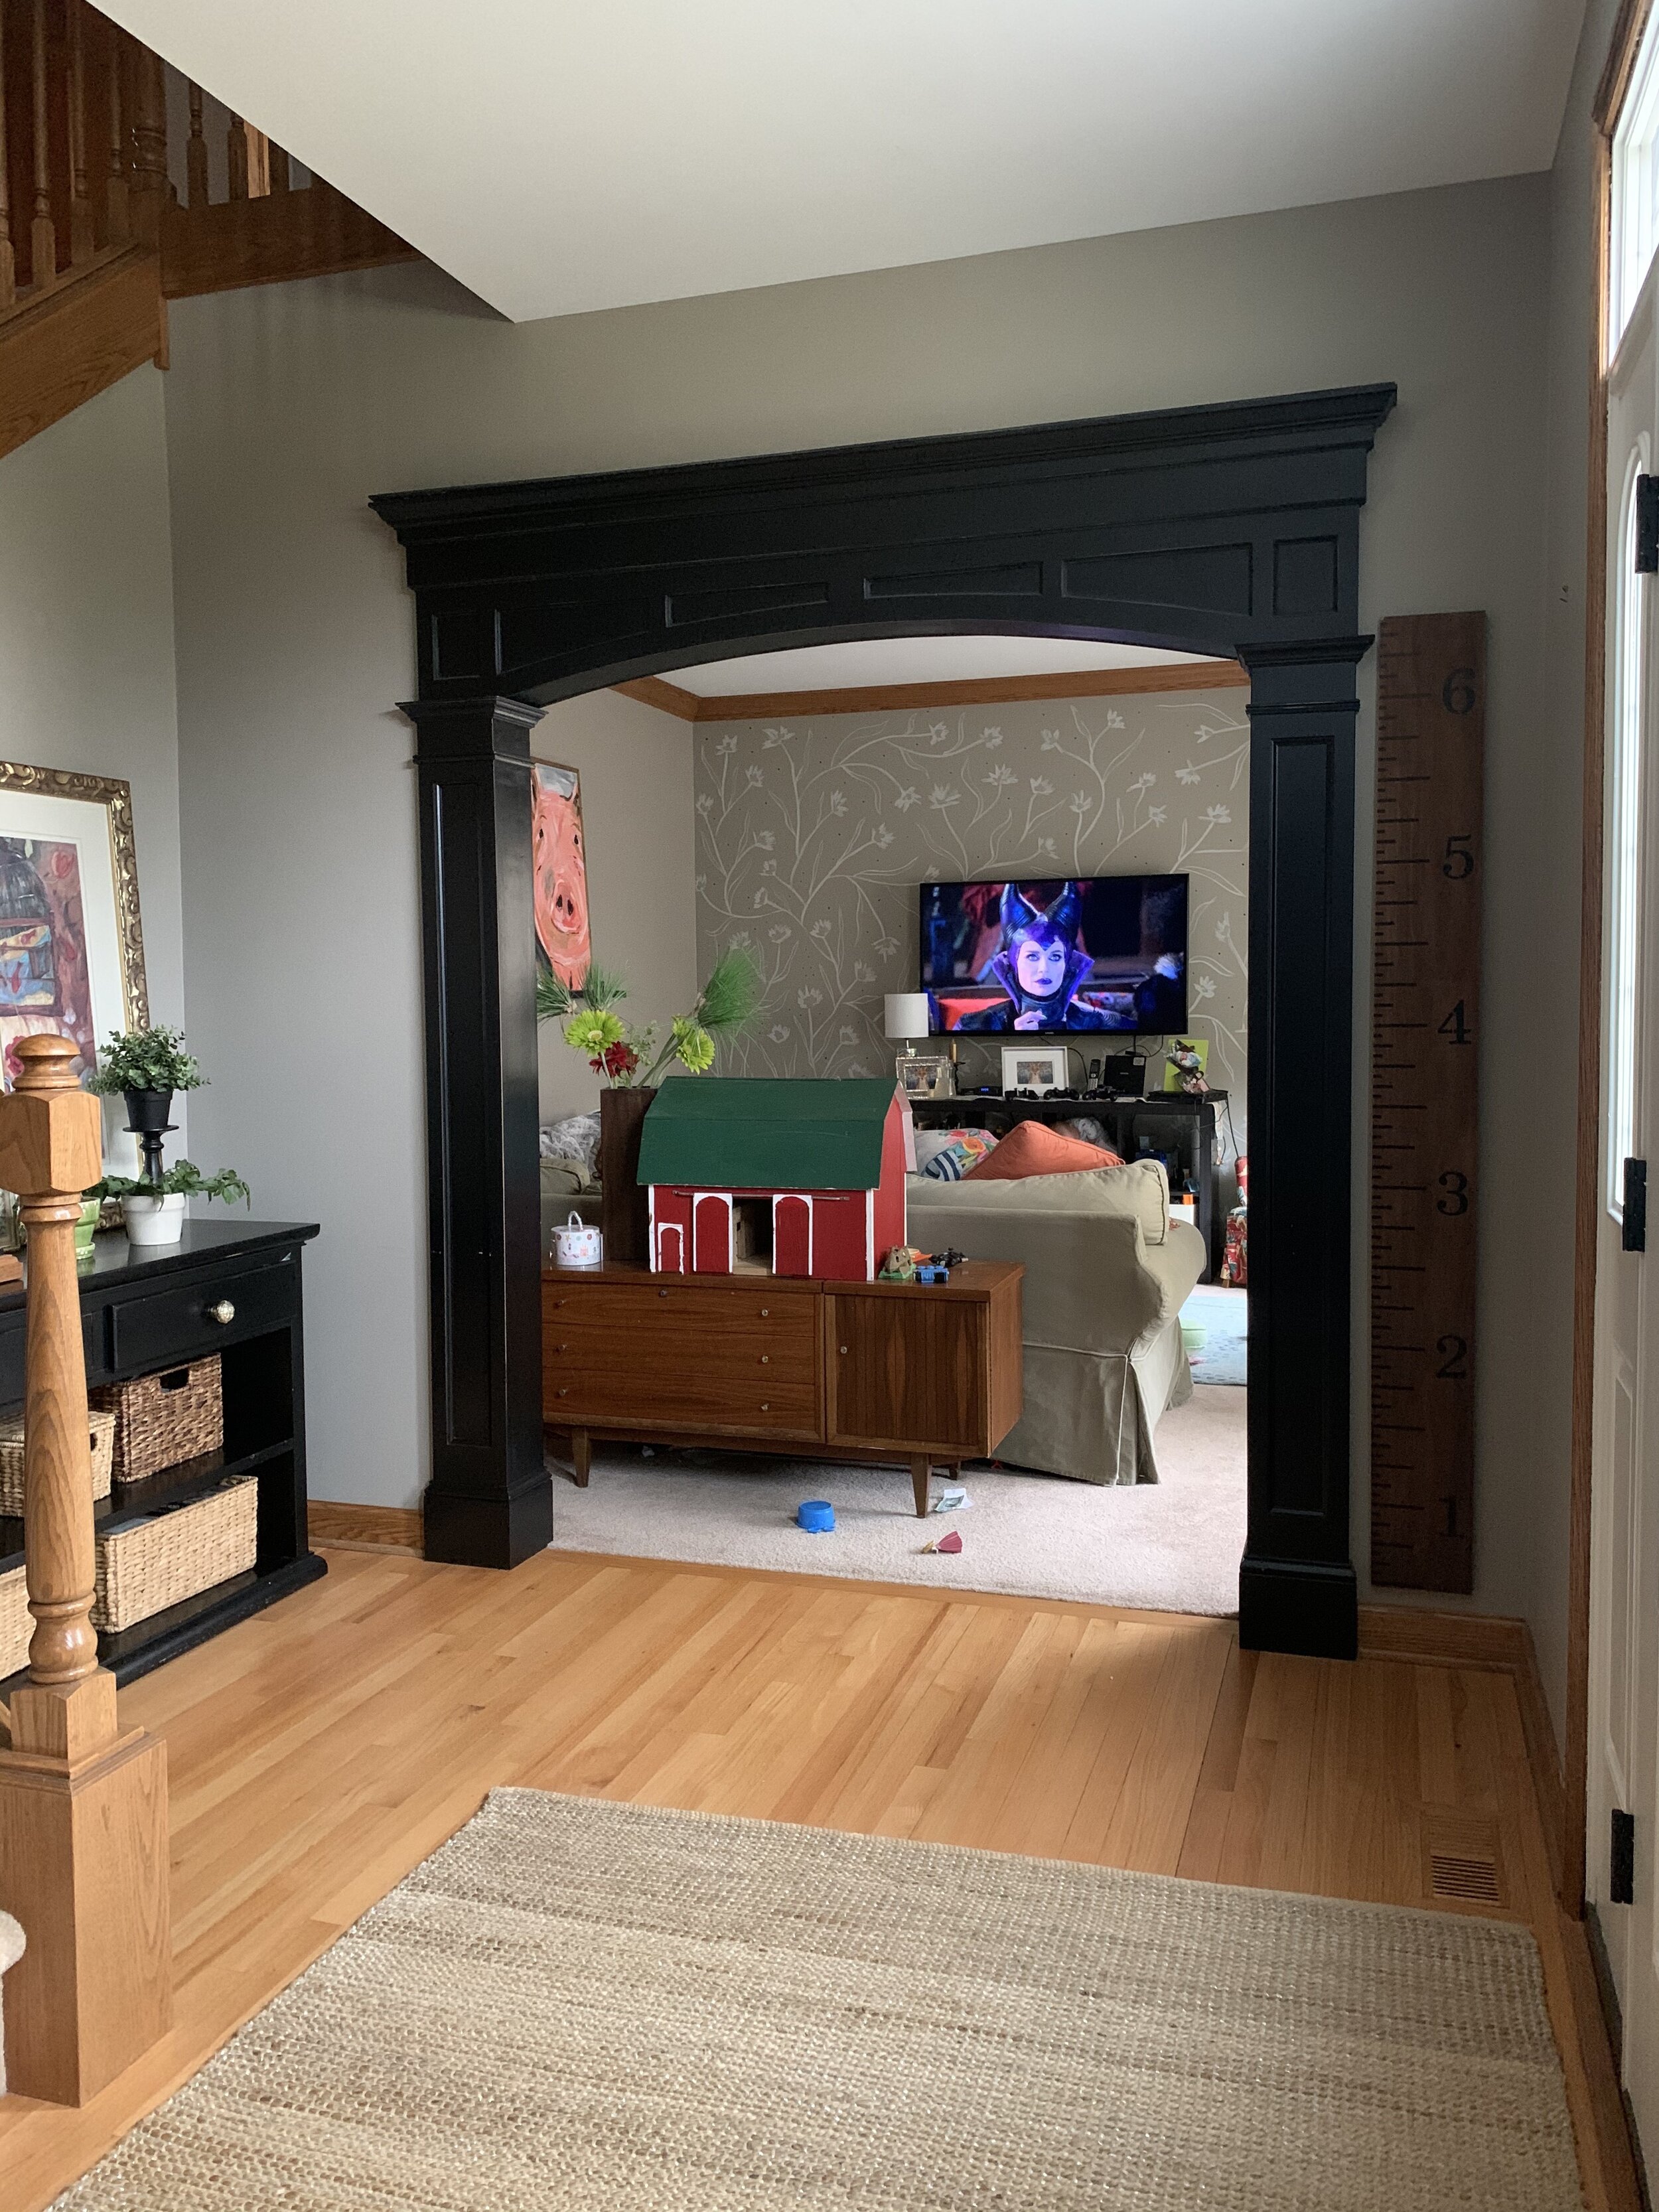
Now, when guests came over, we were still a mess, but at least our mess had a touch of sophistication to it.✨
ok, about the new moulding…. I looked on facebook and found a local wood worker. I had him come over, measure the space, see my sketches and inspo pictures. He measured once. Once, you guys. I was convinced that whatever he was going to build was going to be a disaster😂. But alas, he returned about a month later with this moulding completely built and in 3 pieces. He tore out the old trim and installed this one in about 30 minutes. They fit like a glove. Find yourself a local woodworker. They are gold.
Tip: When you are working with 90’s oak (trim/floors/cabinets/etc), black is a phenomenal way to give it a more contemporary-updated feel. I did that here with the black moulding.
Next up, we ripped out the carpet (and by we, I mean a professional. There are certain things I will do, and certain things I pay professionals to do. You gotta pick and choose). We installed THESE wood floors. I wanted something that matched our current floors, but let me tell ya… it is next to impossible to find an exact match. So we went with the closest thing and I love them! I did a poll on my instagram showing floors that looked semi similar and showing floors that were completely different (different stains of wood). A lot of people said go completely different. My gut said ‘stay similar"‘ and I am glad I did.
Next up paint! I did the far wall in black (Color is Tricorn Black) because of two reasons:
1- I wanted this room to flow with the moulding in the doorway.
2- I wanted to camouflage the tv.
I told my painter the color white that I wanted for the other walls. Not sure what happened, but when I got home the walls were yellow white. Not the white I had chosen. If something looks off to you, then it probably is. I went and got the correct white and we repainted🙃.

Below is the MUCH better white. I left the wood trim around the windows, as well as the wood windows. I don’t like matchy matchy, but at the same time I do like to “tie” things in. The wood flows with the floors and it brings a certain warmth and coziness to the space. So I left them as is. Remember that white is technically a cool color. So having those warm tones will make your space feel inviting and comfortable, rather than like a cold sterile psych ward. Ok, maybe cold sterile psych ward was bit far, but you catch my drift.

Next up, I installed all new floor trim, as well as some wood details going up the walls. What does one call this? Wainscoting? Board and batten? Not really sure, because its not quite either of those things.
We have 9’ ceilings and the thin strips of wood that I got from Lowes were only available in 8’. I could have spliced each piece to add in that additional foot, but that is a pain in the butt. So instead I made sure to get a thicker floor trim and then added an additional strip above it, to give the floor trim a ‘beefier’ feel as well as make those 8’ strips fit perfectly! We already had the crown moulding, but if we didn’t, I would have added it.
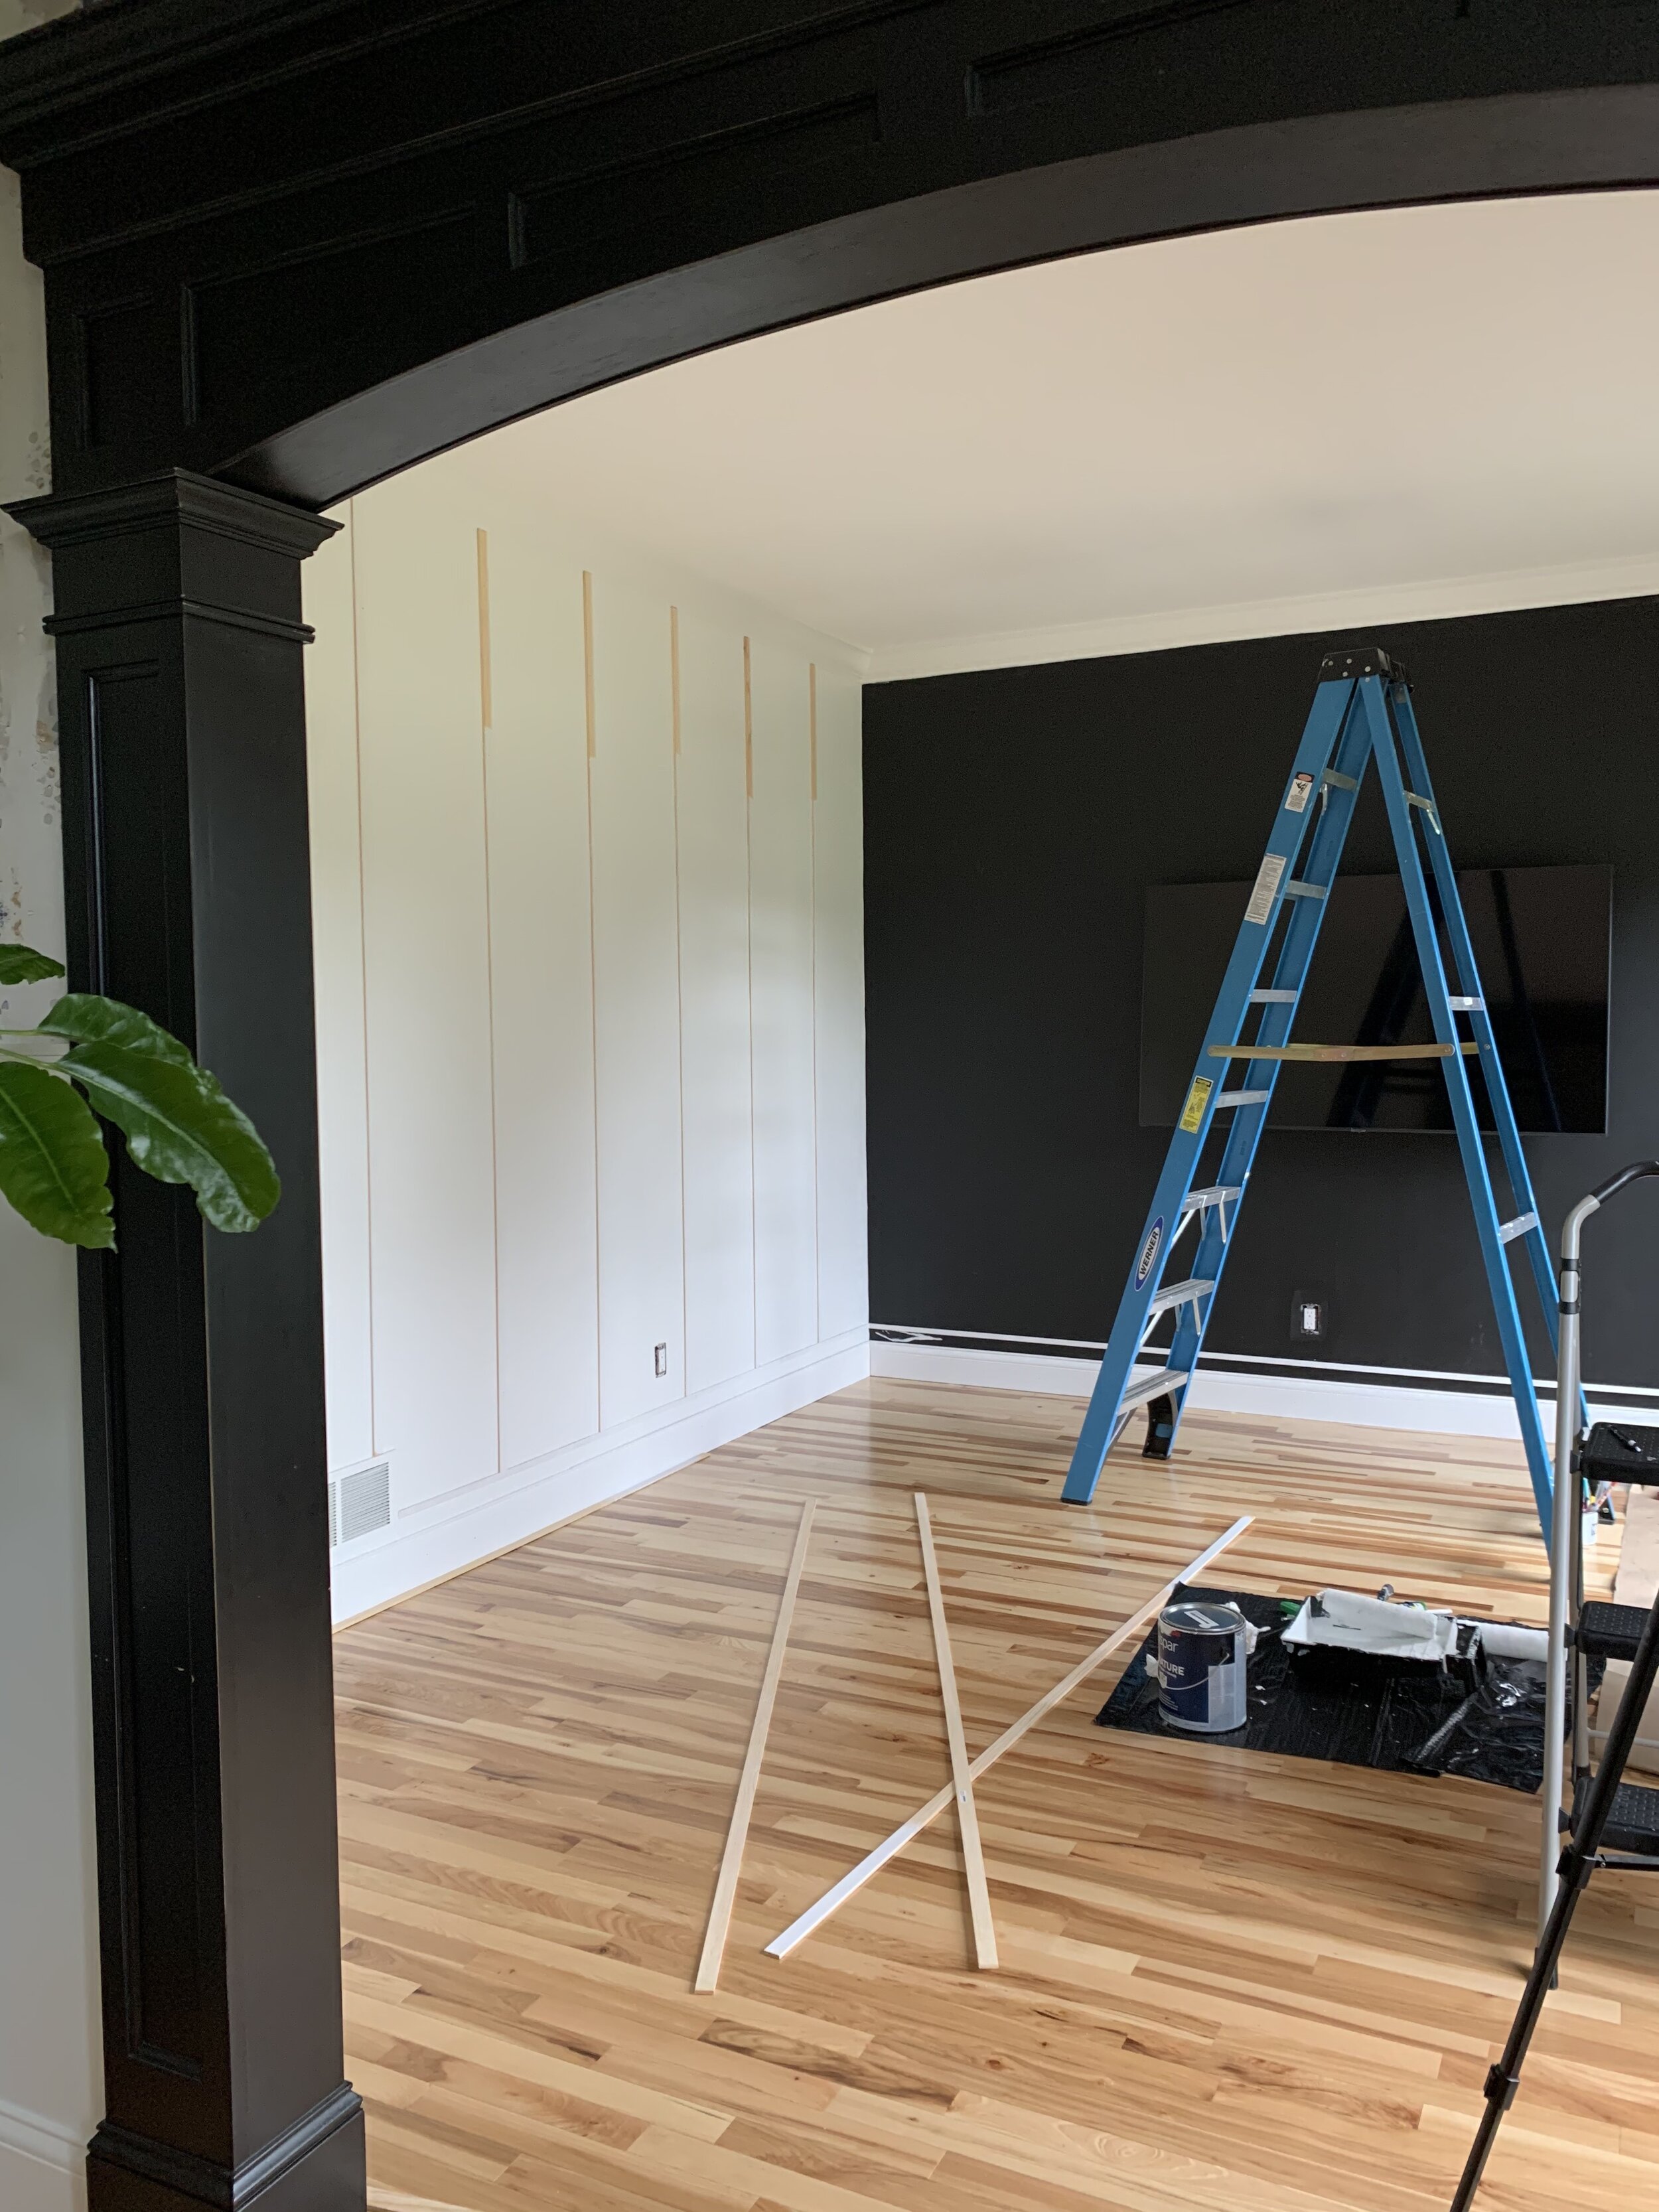
Now, you may think that you could never do carpentry work, like trim and wainscoting. But you can! The key is simply having the right tools for the job. No one taught me any of this stuff. I bought the tools, tinkered around a tad and figured it out. You are smart. You got this.
Here is every tool I used to do the carprentry work in this room. These are the tools that I use for almost every project that I do. You will get your use out of them!
Saw (light weight, battery powered and one of my most favorite tools). Saw Table.
Sander (I like my wood to feel like butter, so I typically do a 600grit sand on just about everything)
Nail gun ( this is battery powered and I love it so so much)
Batteries ( I like to have two. If one dies, I can switch it out :)
Level (everyone needs great level)
After cutting your wood and nailing it in, you need to fill the nail holes :).
I use caulk in the corners and wood putty on nail holes. What I like about wood putty is that you can give it a little sand, once it dries, and it looks silky smooth✨.

After:

In the middle of the remodel, I decided to use this room for a quick wallpaper photoshoot! It was so pretty!!!!
You can find all of these wallpaper designs HERE.
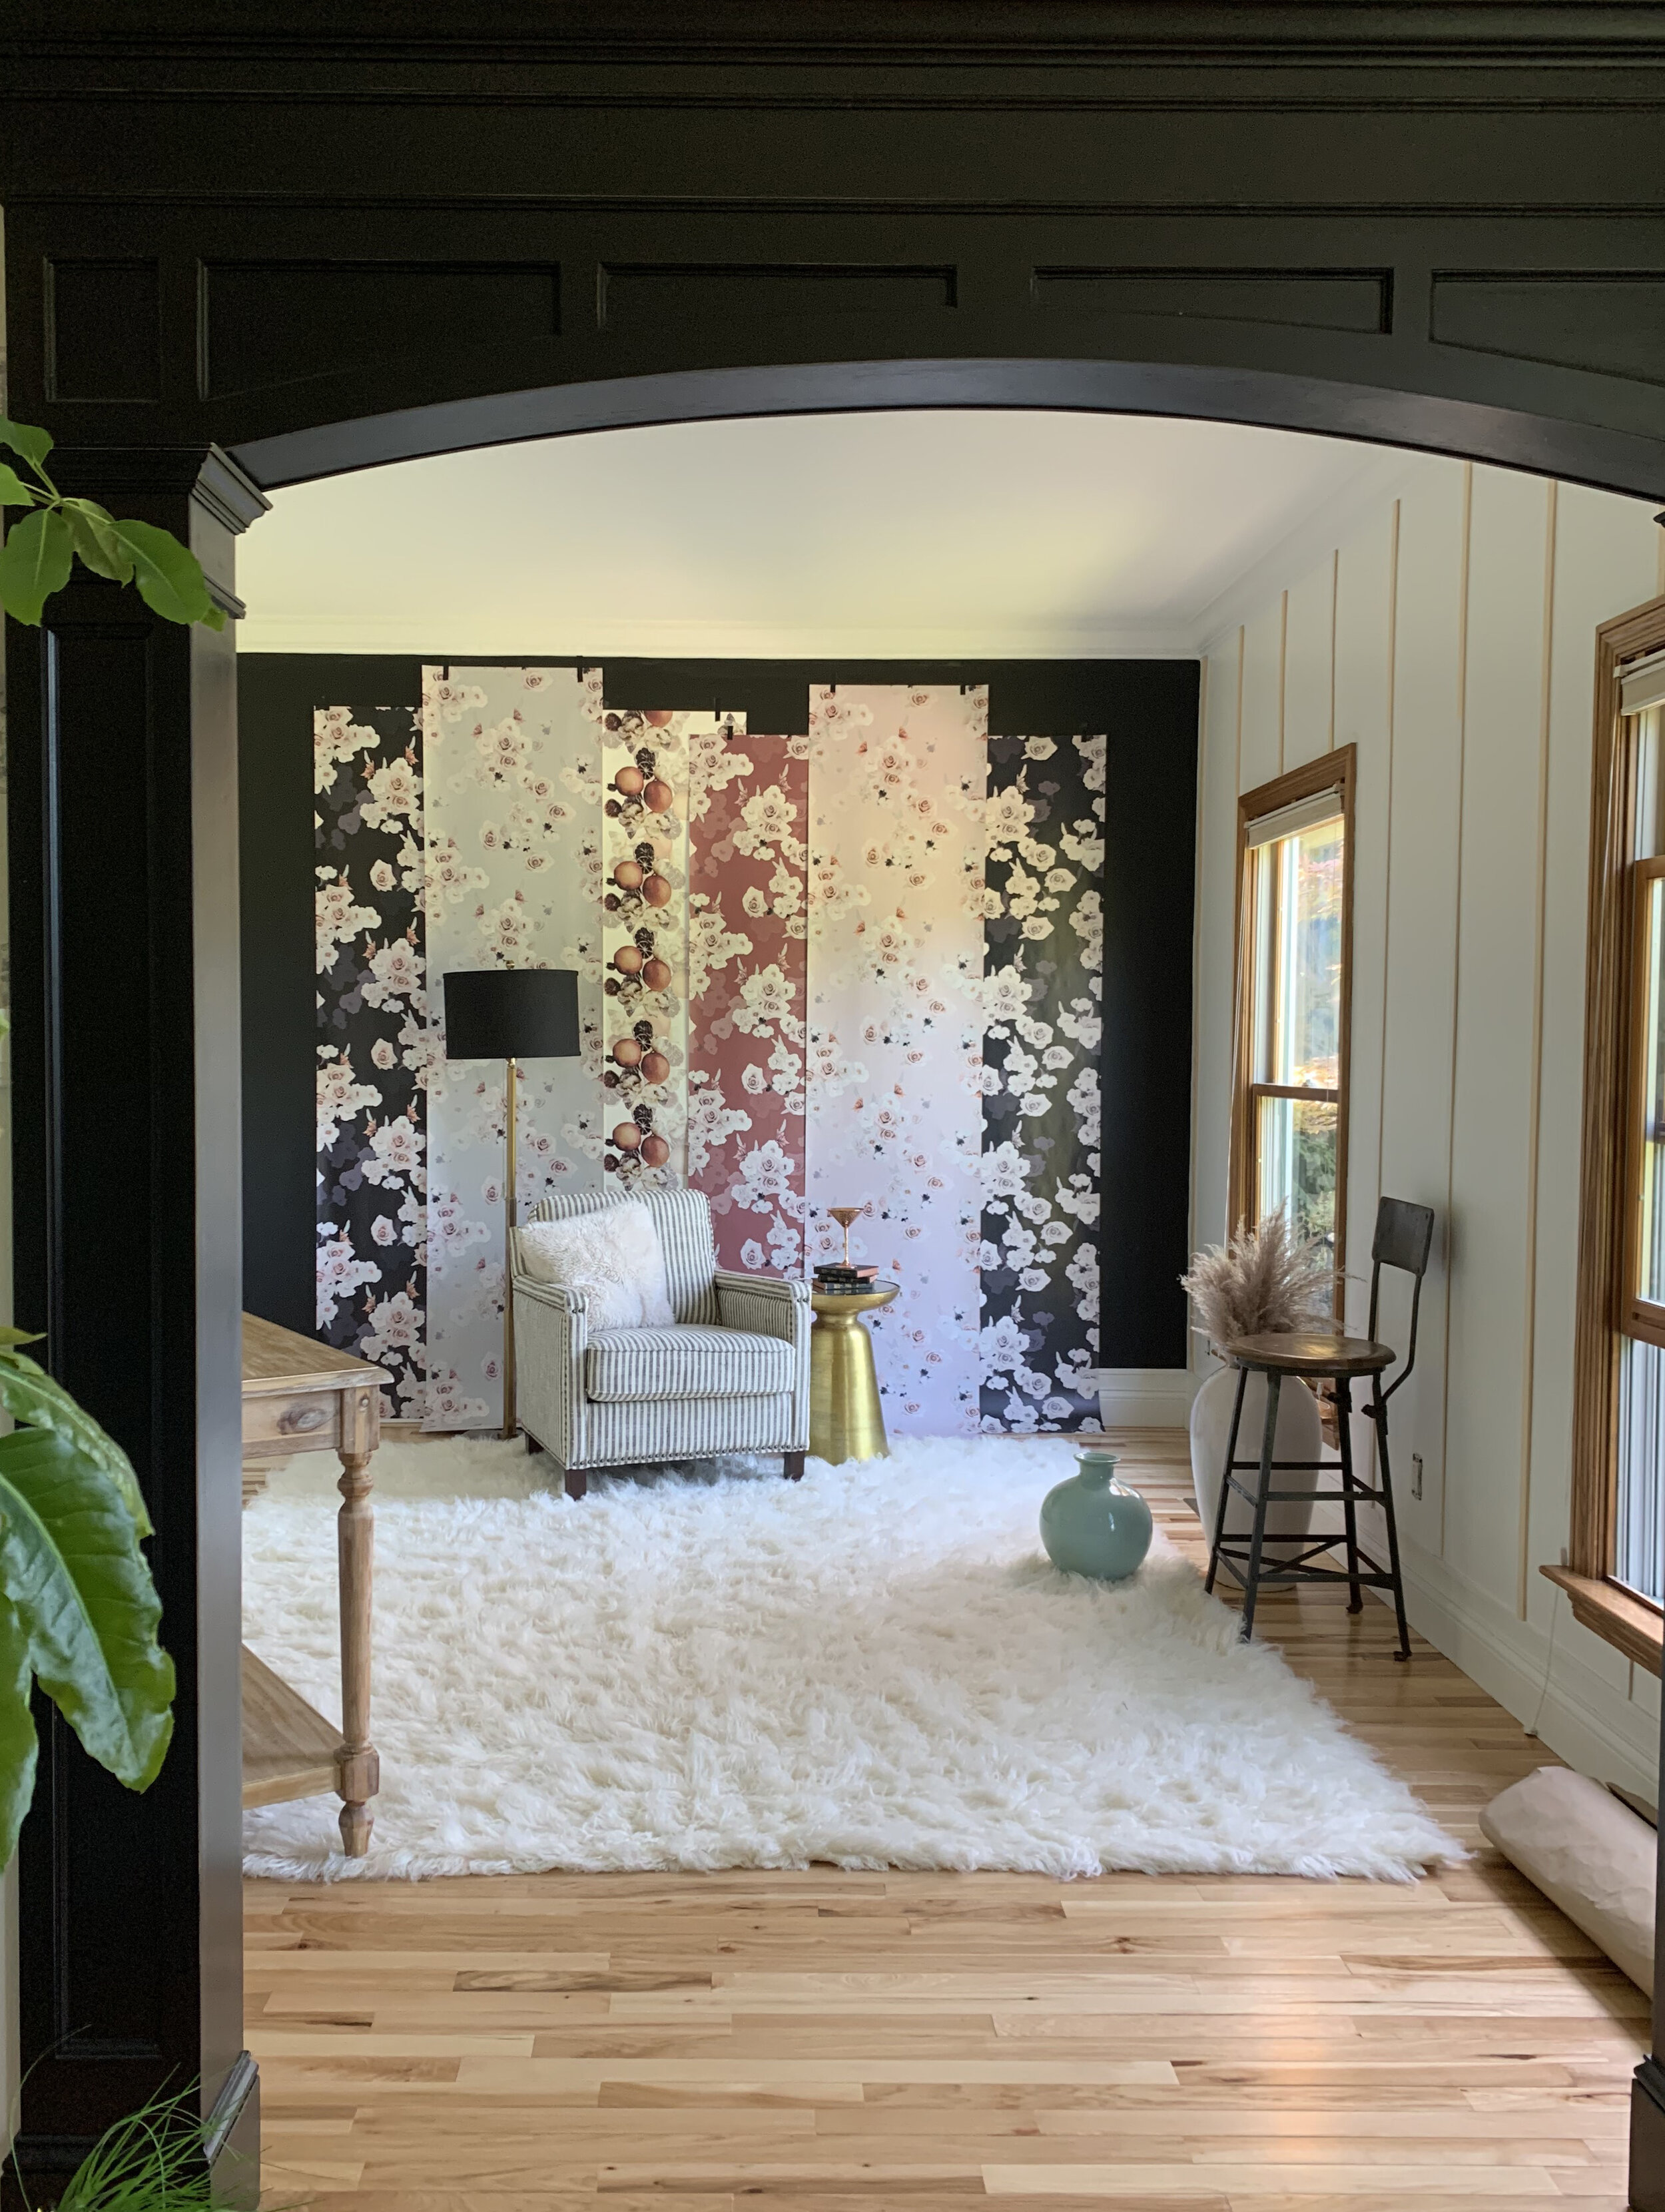
We came up with many ideas for this space, and you all vote on them! You can see some of the wallpaper, rug and chair combos that I put together HERE. You might find something fab that inspires YOUR space!
The original chunky white wool rug wasn’t working for this room. It was too thick and it shed like crazy. You would have thought we had sheep living in our house. I switched it out for this RUG and I love it so much!! It has warm taupes, cool grays and a charcoal. The pattern is there, but also subtle enough, making it super versatile. (This is a stunning rug and I think I might still have a code for 60% off! Try ‘CC60’ at checkout😉). I wanted a patterned rug, but something that was muted enough to not distract from my upcoming wallpaper plans ;).
Next up, the chairs arrived!! I chose THESE CHAIRS for various reasons:
1- they are wide, great for bigger guys.
2- they swivel
3- the slipcovers come off and can be washed and dried! That is major when you are dealing with children ;).
4- the arms end mid seat, making it comfy for people who like to sit spread eagle (my husband)
5- I love Pottery Barn sofas and chairs.
Here are a few links to other items I considered for this room:
The Horse Artwork | The Swatch Artwork | The Mazes wallpaper | The Orange wallpaper | Wicker coffee table | Shelving I bought | Rug

Next up: Hang curtains + pick a wallpaper (for the ceiling!)

I have THESE CURTAIN RODS in every room of my house! They are available in various finishes and sizes. I love them because they wrap around, which allows you to wrap your drapes around as well. I am not a fan of drapes sticking out strangely from the wall. These hug the window :). I like to hang my rods high and wide! it gives the room height and the illusion of bigger windows.

This leather ottoman wasn’t cutting it.

We pulled THIS OTTOMAN from our TV ROOM and tested it out in this space. I love a beautiful blush and this sealed the deal that I wanted a wallpaper with a touch of blush in it for this room.

Now, I have hung lots of wallpaper in my day, but never on a ceiling. The idea made me a tad nervous, so I called a few of my professional wallpaper hangers. All of them said they would NOT hang wallpaper on a ceiling. That is a bad sign. Even the professionals thought it was too difficult.
I was determined to finish this room with a fabulous wallpapered ceiling, so I got to work on a new idea! I spent a few weeks designing and creating a new type of wallpaper that would be for ceilings, easy to install and a one-person job.
Once I had my prototype ready, I installed it myself.
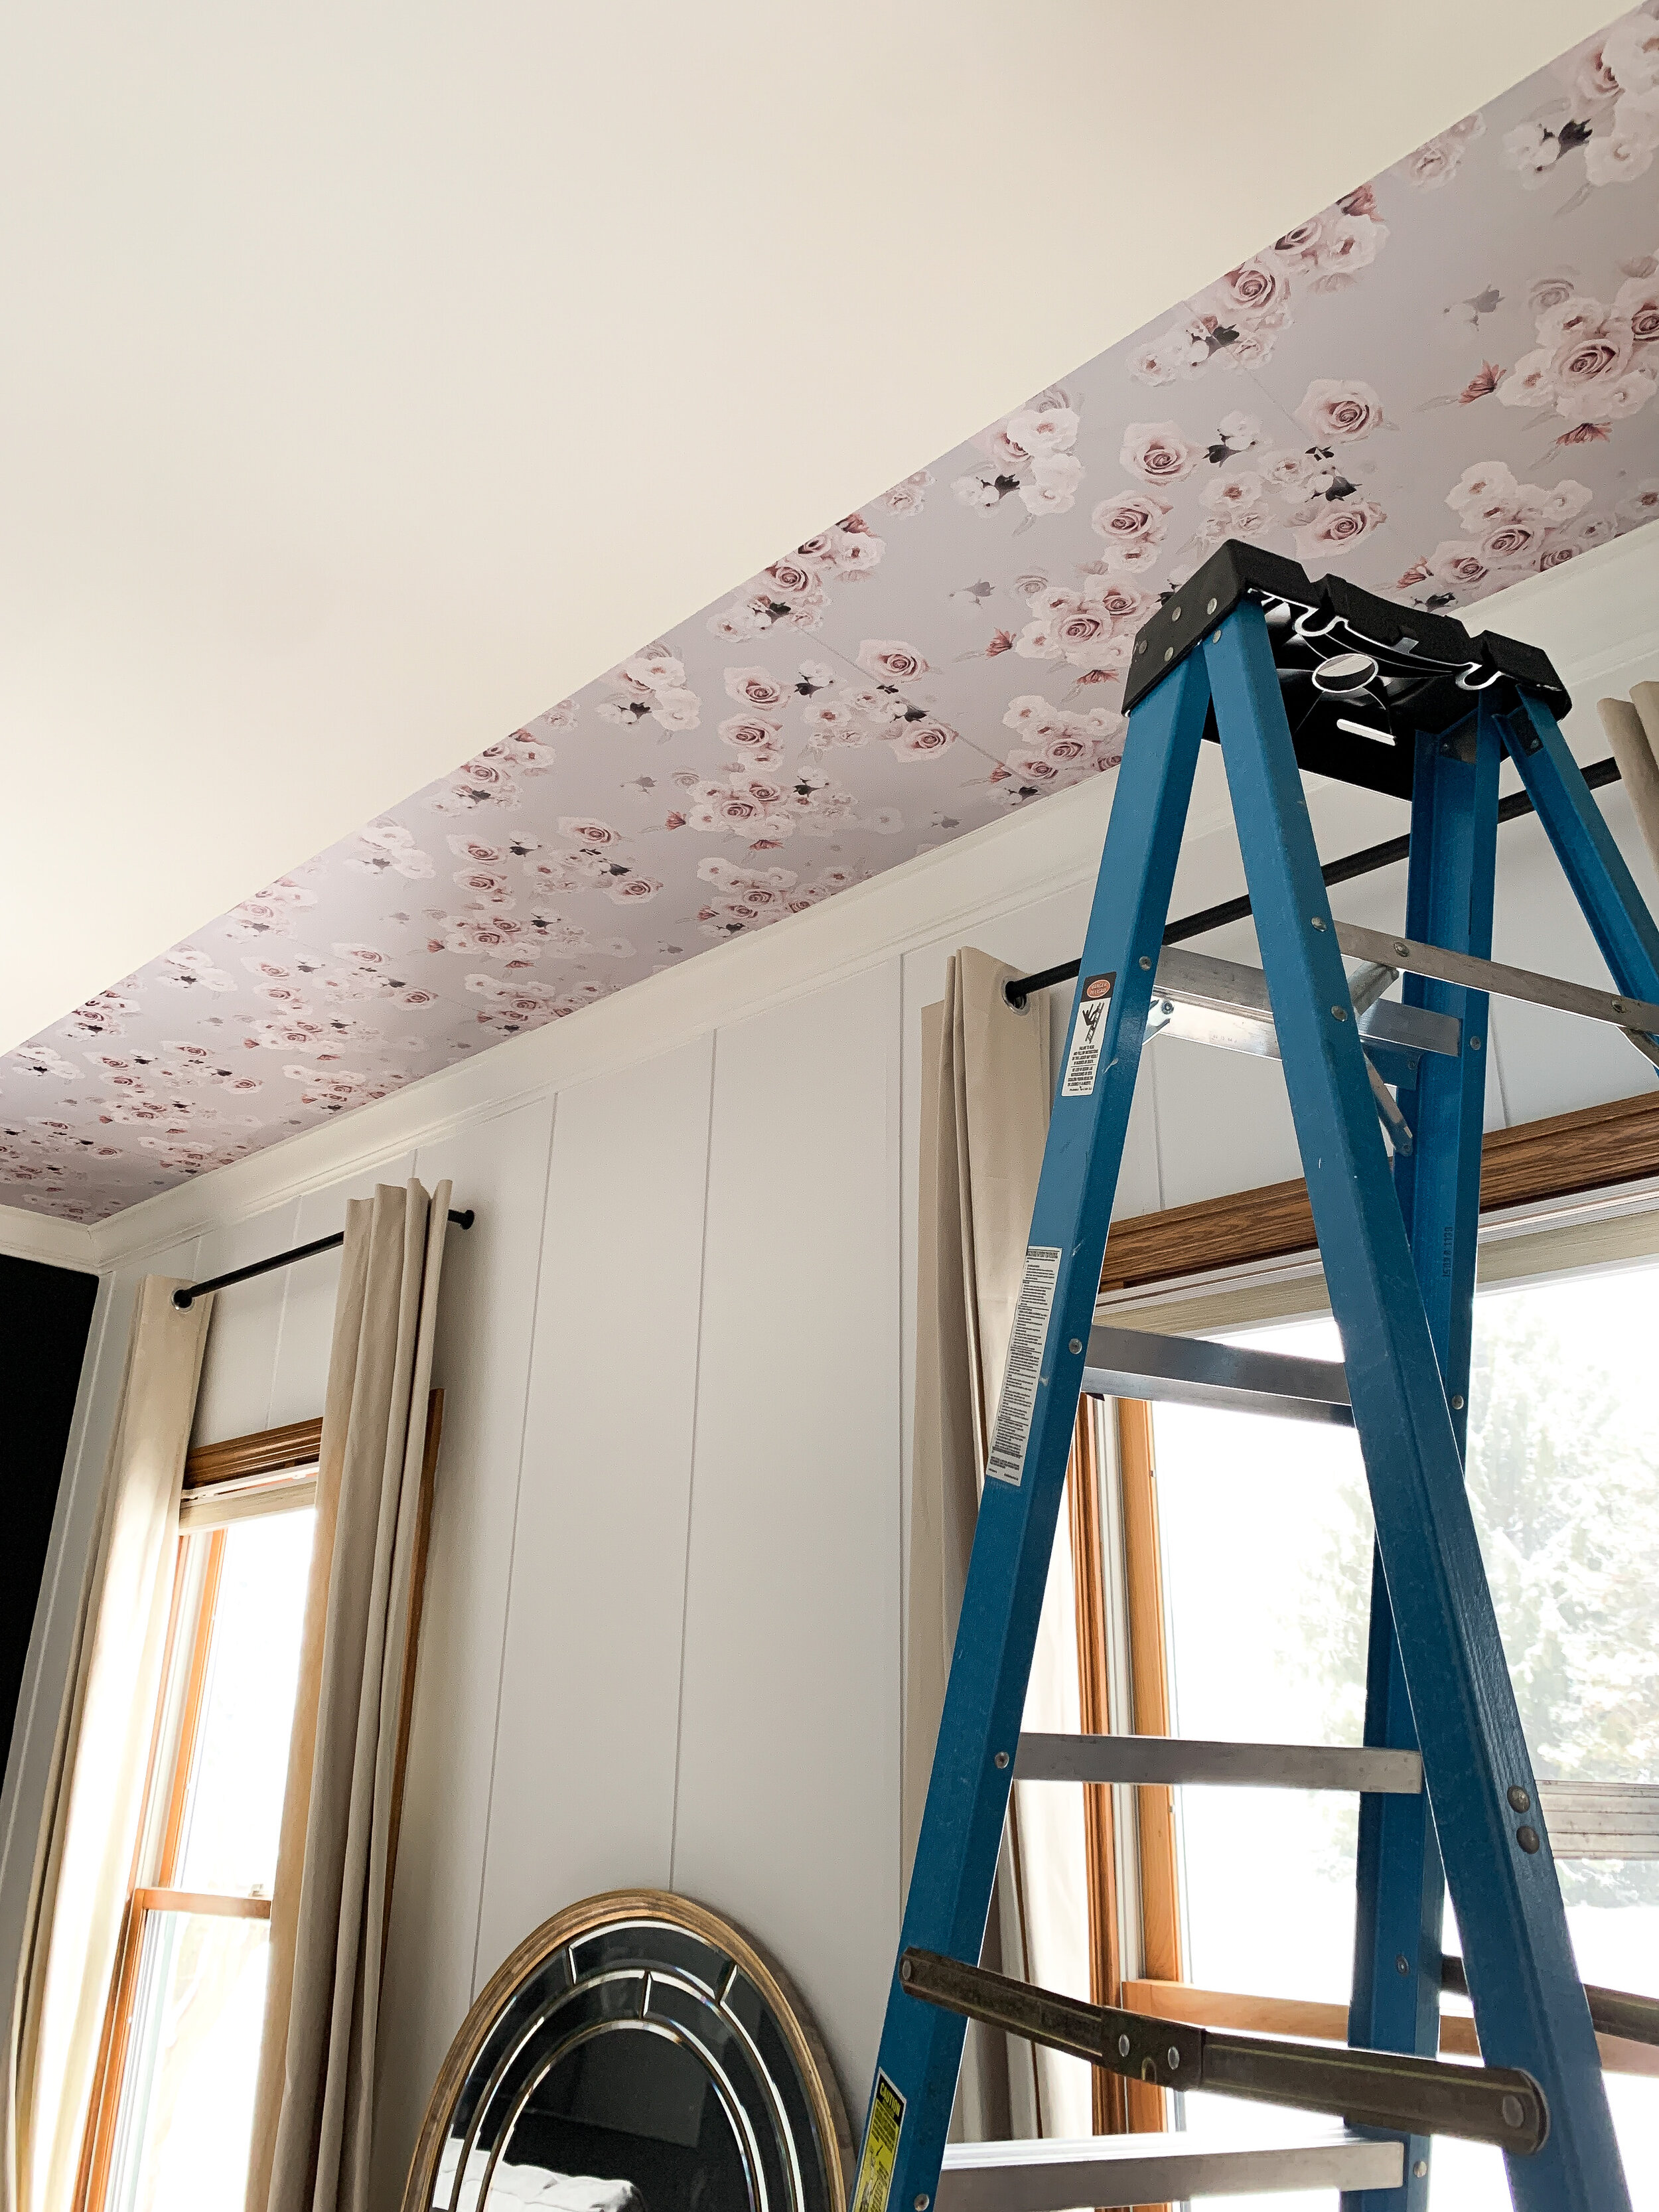
It was a dream. I only said 1 swear word, it took me only a few hours to do the entire ceiling by myself and it was everything I hoped for. I learned what tweaks I needed to make to my prototype and then perfected it for YOU!!!
Guys, a wallpapered ceiling is what dreams are made of! Find all of the wall and ceiling wallpaper options HERE.


When quarantine started, I also revamped the entryway (outside area of this room). I will save that post for another day, but linked the Slow Dance wallpaper below :).
I hope I have given you some ideas and inspired something fun for your space. Remember, it is YOUR home. Make it how YOU want it :). Check out more of my blog posts HERE.
I love hearing what you think, so leave your comments below!! :)
Thank you for stopping by and for always loving and choosing my art for your home❤️. Remember to swing by the gift shop on your way out HERE.
xo
Mary-Catheryn
A few more links for you. :)
Ceiling tile wallpaper ‘Menthe + Blush’ | Entryway wallpaper ‘Slow Dance Night’ | Lamp with white shade | Drapes are Ikea | Mirror is vintage Labarge | Tv is Costco | Pink ottoman is sold out, but here is the other ottoman I love that we have |


